After seeing some wonderful people spend incredible amounts of time making breath taking tombstones I decided I would do that too... Then I decided something good was on TV and forgot about it. But then I came back, like a Phoenix with one quest, to get the look they achieved with half the work. And now I am going to tell you haunters how.

These are cheap terrible tombstones I got from Party City. I wouldn't build an ice chest out of them, and yet they will be the foundation for your tombstones. Basically, we are going to use them for their carvings and build them out into a real, hearty tombstone.

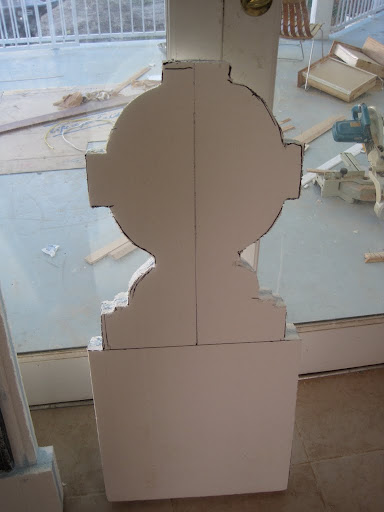
This is what we want to achieve. Start with 2 inch foam insulation. If the store has pink or blue foam use that, it is finer and so much easier to carve. If you are in California, like me, you will probably be regulated to good old beaded styrofoam. It's a little rougher and messier but we will make it work. Cut out a tombstone shape that echoes the shape of your cheap dimestore tombstone. You will need to double it to make the final tombstone 4 inches thick. Terra at Scary Lady Videos came up with a brilliant way to mount these tombstones to the ground: you will need to sandwich two sections of pvc pipe in channels between the two pieces of foam.

Later you can drive two pieces of rebar in the ground and then thread the tombstone over them with the pvc protecting the soft foam from the rebar poles. But back to the crafting!

Use caulking gun foam adhesive to stick everything together. You can smooth out any joints and make sure it looks like one carved piece. I chose to build out the base a bit and add some 1/2" thick styrofoam I got from a packing box. To either side of the purchased tombstone I cut simple grooves with an angled box cutter against a straight edge. Little lines like this can help fill in blank areas and give your stone extra detail.
Here's another example of a fun shaped tombstone.

...and how it looked after I added my cheap Party City tombstone and built out a shelf and corner pieces from left over foam scraps. The cool etchings you see in the foam were made by spattering and drizzling acetone over it. [Be careful, a little acetone goes a long way and can eat all the way through the foam!]

Paint the whole thing with black exterior paint.
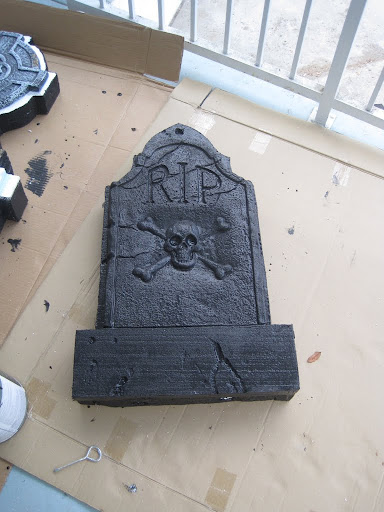
You will be shocked at how well painting the entire thing one color will mask that it is glued together from many different parts.

Now for a name. Real artists will carve or Dremel in a name. I chose the easy way and found these stick on letters. Align them to spell the name of the deceased. It doesn't matter what color these stick on letters are, we are using them to mask off areas. We will paint over them and remove them to reveal the black underneath.

Now sponge paint away! There is nothing like a fake sea sponge to give you a fake granite look. I just chose a plain grey, but a rose or dust color will work. When you like the look, remove the letters and if you choose, you can spray the whole thing with polyurethane to protect it.


Finished and mounted on the rebar. Each stands between 2.5 and 3 feet so they really have an imposing tombstone size at a fraction of the cost and of buying large professional looking tombstones. Now go make some and start scaring the neighbors!
So fun and easy. You make learning about creating these quirky yet adorable tombstones simple and a joy. You remind me of my guru, Beverly Scarwin Barnes.
ReplyDeleteI hope to one day be as glamorous and misinformed as she :)
DeleteAren't you worried that dogs will dig up the remains of Chris P. Bacon? I may take with me some of these strategies to make guns for Ripley...
ReplyDeleteYou can build anything with pvc and foam. I guarantee it!
ReplyDeletePremature ventricular contractions, got it!
ReplyDelete